Table of contents
- Registration, sign-in and permissions
- Enable or disable registration
- How account activation works
- User groups and access levels
- Add a login form
- Separate login and registration pages
- Recover a username or password
- Multi-factor authentication
- Protect registration and sign-in
- What to check after setup
- Conclusion
Joomla lets visitors create accounts, restrict content to registered users and protect sign-in with an additional verification step. This guide covers registration, account activation, login forms, access permissions and password recovery in Joomla 5 and 6.
Registration, sign-in and permissions
An account, a login session and a user's permissions serve different purposes. Set up each part to make a restricted area work correctly.
- Registration creates an account with a username, email address and password.
- Activation verifies the email address and, in the selected mode, requires an administrator's approval.
- Authentication checks who is signing in. This normally uses a username and password, with an additional verification step when MFA applies.
- Authorisation determines what the user can see and which actions they can perform.
Signing in successfully does not automatically give a user access to every article or to the administration panel. Check authentication and permissions separately.
Enable or disable registration
Self-registration is useful when visitors need their own accounts. If only a few editors use the site, an administrator can create their accounts manually and keep public registration closed.
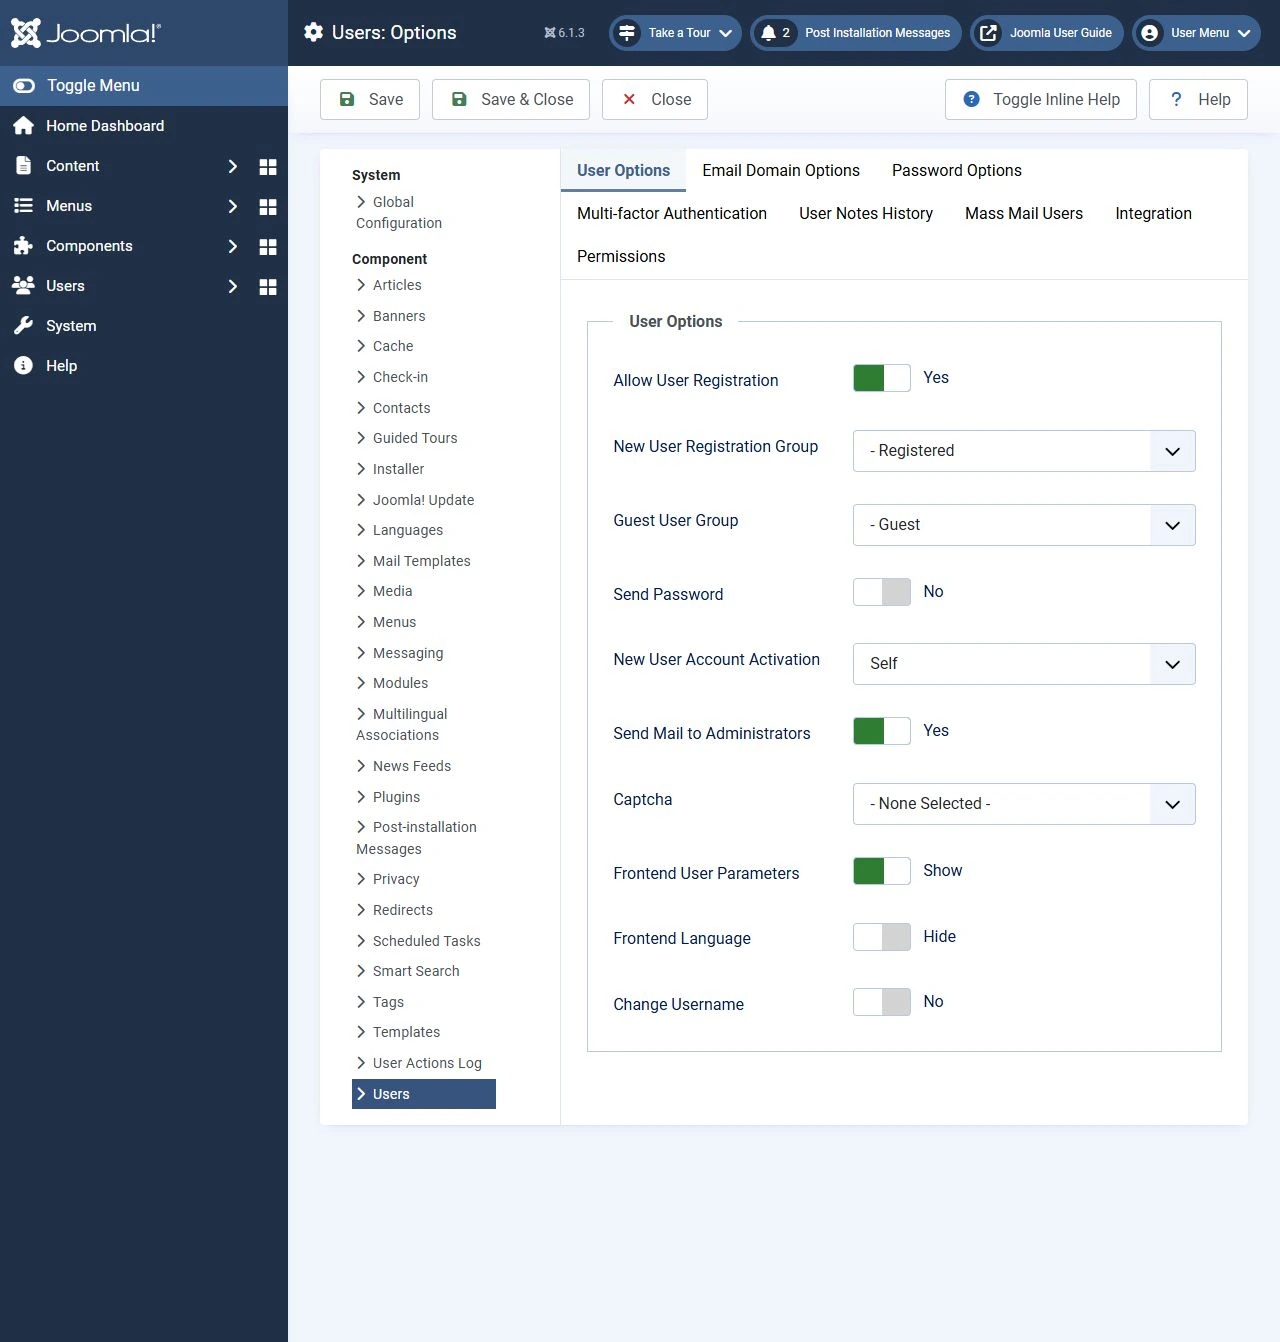
- In the administration panel, open Users → Manage.
- Select Options.
- On the User Options tab, set Allow User Registration → Yes.
- For New User Registration Group, choose Registered or a group prepared with the minimum required permissions.
- Choose the account activation mode.
- Set Send Password → No to keep the password out of the registration email.
- Save the settings and check the registration form in a separate browser session.
To stop visitors creating accounts, set Allow User Registration → No. This does not delete existing accounts or, by itself, prevent their owners from signing in. Hiding the registration link in a menu or template does not replace disabling registration in the user options.
How account activation works
New User Account Activation determines when a new account becomes available for sign-in. Choose whether email verification is sufficient or each applicant needs approval.
| Mode | What happens after registration | When to use it |
|---|---|---|
| None | The account becomes active without email verification. | Only when unverified email addresses meet the site's requirements. |
| Self | The user receives an email and activates the account through its link. | For open registration with email verification. |
| Administrator | The user first verifies their email address. An administrator then receives a request and activates the account. | For communities and restricted areas that need manual approval. |
With administrator activation, verifying the email address does not yet allow the user to sign in. They must wait for approval. Check that the responsible administrator has the required permissions and receives system emails.
Send Mail to Administrators controls new registration notifications when activation is set to None or Self. This notification is separate from the approval request required for administrator activation.
Before opening registration, check outgoing mail under System → Global Configuration → Server. After sending a test email, complete a test registration too. A working mail transport does not prove that the activation message reaches the recipient or contains the correct link.
User groups and access levels
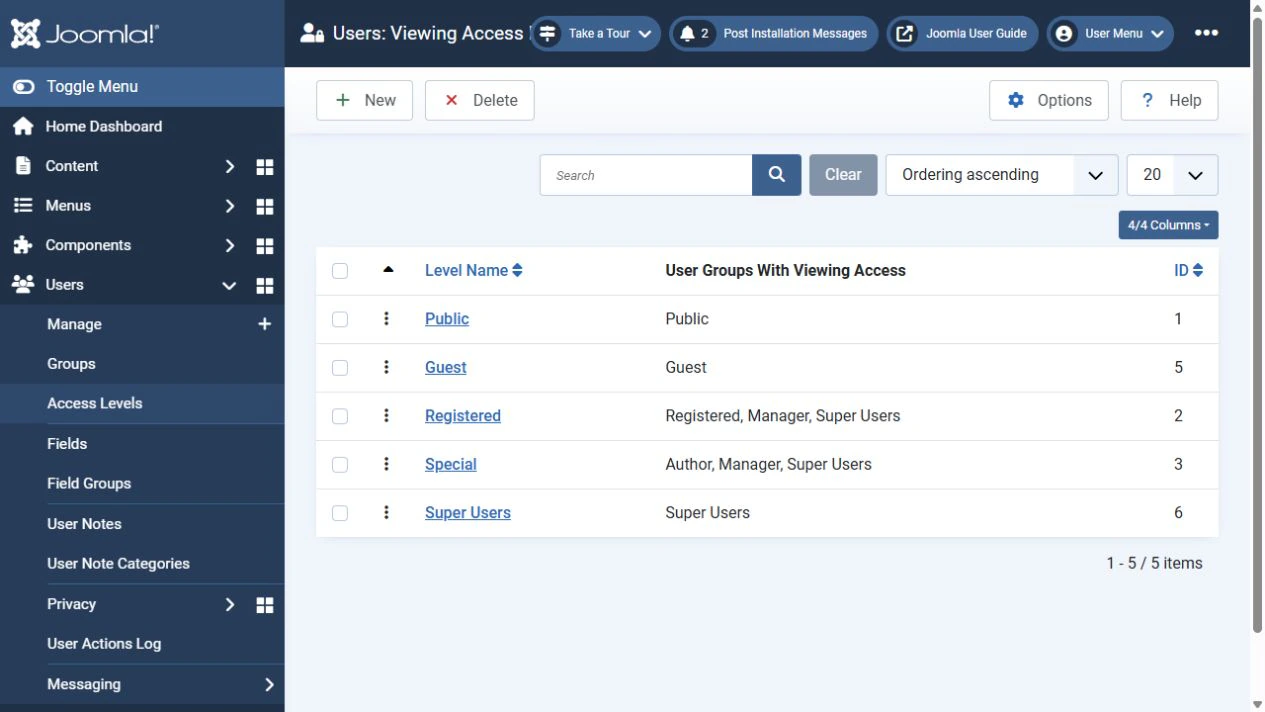
In Joomla, user groups and viewing access levels are related but serve different purposes. Groups participate in assigning permissions, while access levels control the visibility of articles, menu items and modules.
| Setting | Purpose | Example |
|---|---|---|
| User group | Groups users by role. Parent group membership is also taken into account. | Registered or a dedicated members' group. |
| Access level | Specifies which user groups can view an item. | Registered for content available after sign-in. |
| Permissions | Define allowed actions, taking inheritance and denials into account. | Creating, editing, deleting or changing the state of an article. |
Open Users → Groups for groups and Users → Access Levels for viewing access levels. Assign a user's groups in their account.
To restrict an article to registered users, select its Registered access level. Check access for its category, menu item and related modules too. Restricting a menu item hides the link but does not replace restricting the article itself.
In a standard configuration, Public is suitable for public content, Guest for content intended for visitors who are not signed in, and Registered for users in the relevant groups. On a customised site, inspect each access level's groups instead of relying on its name.
Viewing access does not grant editing rights. Test restrictions with an ordinary account, as a Super User account is unsuitable for checking a visitor's permissions.
Add a login form
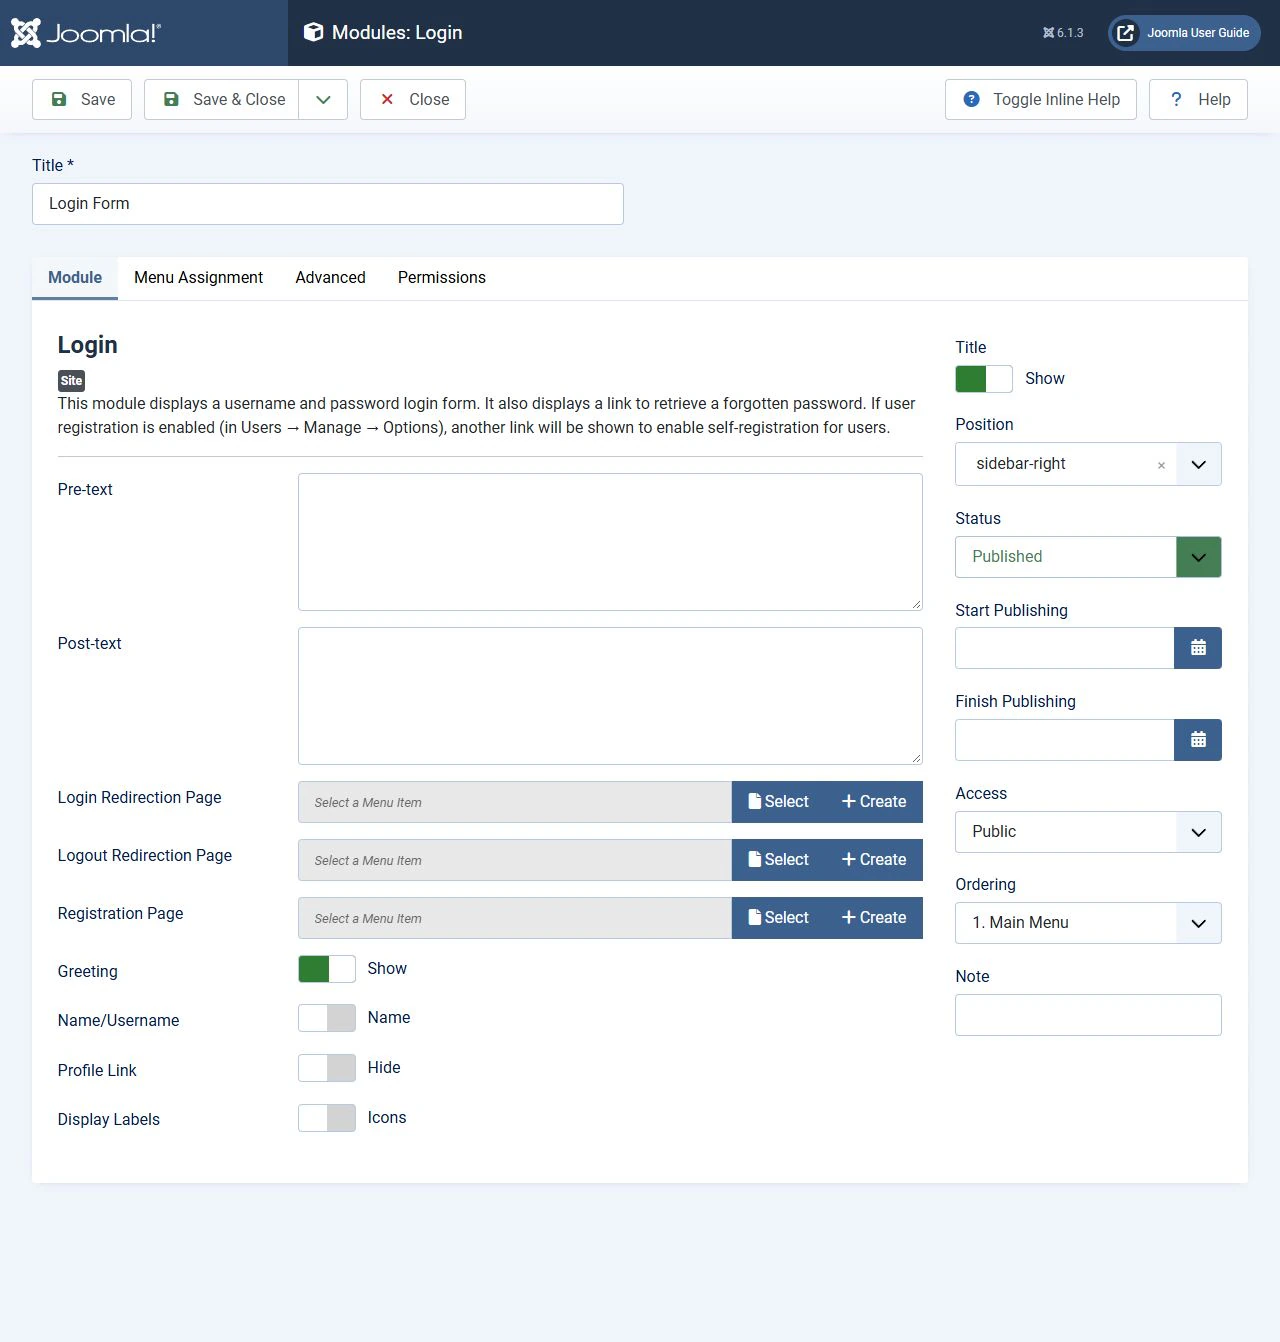
Joomla provides a login module and a separate page from the Users component. Use the module in a sidebar or another template position, and a separate page for a permanent menu link.
- Open Content → Site Modules.
- Select New and choose Login.
- Enter a title and select a position supported by your template.
- Set the status to Published and access to Public if the module should show a login form to guests and a logout button to signed-in users.
- On the Menu Assignment tab, choose where the module appears.
- If needed, configure the login and logout redirection pages.
- Save the module and check it on the site.
With Guest access, the module disappears after sign-in. Provide another logout button or menu item in that case. With Registered access, visitors may be unable to see the form before signing in.
The standard module's registration link depends on whether registration is allowed. A template override can also change how the module appears.
Use Remember Me only on a personal device. It does not replace a password, MFA or signing out on a shared computer.
Separate login and registration pages
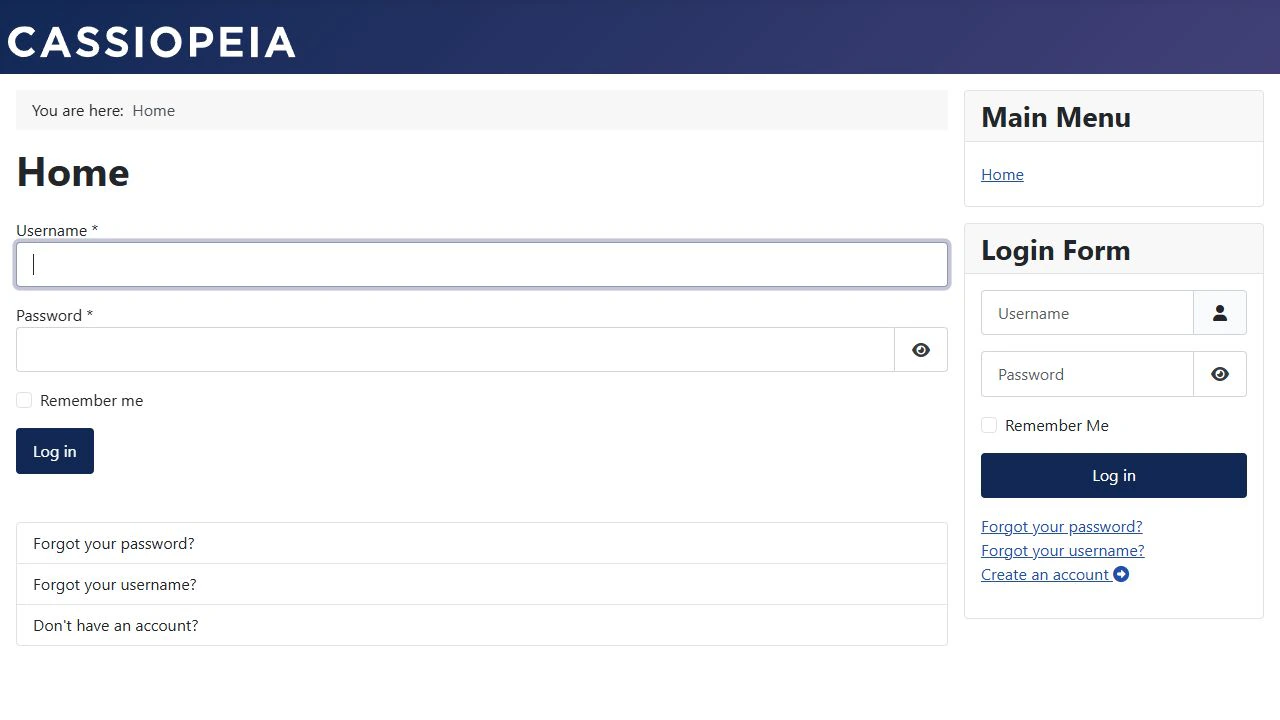
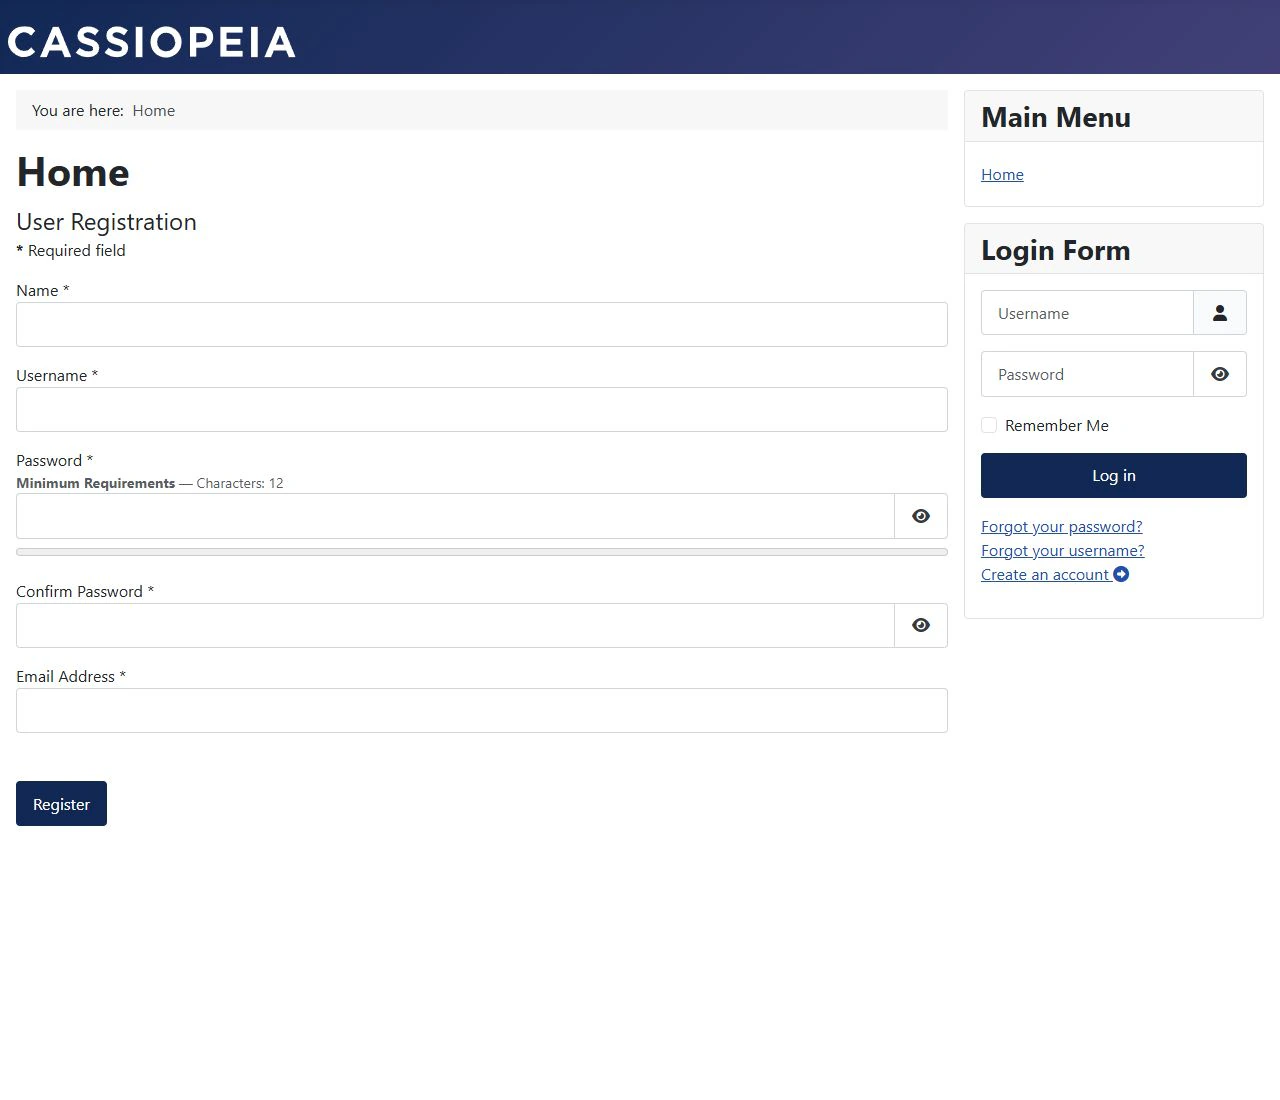
Menu items provide clear addresses for forms and control their page options. Create a separate menu item for each page you need.
- Open the required menu and select New.
- Next to Menu Item Type, select Select.
- Under Users, choose the login form or registration form.
- Enter a title and alias, such as
loginorregistration. - Check the menu item's status, access and language.
- Save it and open the page as a guest.
The resulting address depends on the alias, parent menu items, language prefix and SEF settings. An address containing component/users is not the only possible address for every site.
The standard forms use these system addresses relative to the Joomla installation root:
- Login:
index.php?option=com_users&view=login. - Registration:
index.php?option=com_users&view=registration. - Username reminder:
index.php?option=com_users&view=remind. - Password reset:
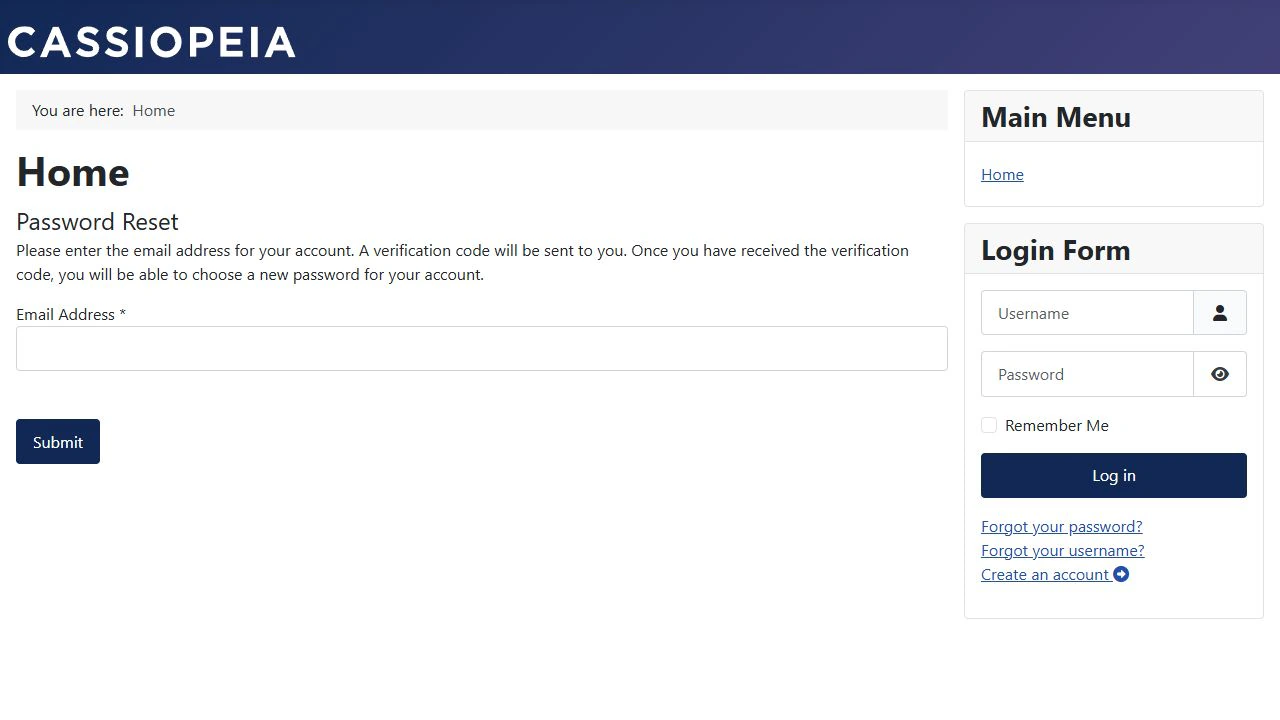
index.php?option=com_users&view=reset.
On a multilingual site, create menu items in the appropriate language and check where the links in the login form lead.
Recover a username or password
Account recovery requires access to the email address stored in the account. The old password is never recovered or displayed. A password reset lets the user choose a new one.
For a forgotten username, select Forgot your username? and enter the account's email address. Joomla sends a reminder to that address.
- To replace a forgotten password, select Forgot your password?.
- Enter the account's email address.
- Open the email and follow the confirmation link. Enter the username and verification code if requested.
- Enter and confirm a new password.
- Sign in with the new password and complete MFA if it applies.
Resetting a password does not unblock an account or disable MFA. Accounts with Super User permissions cannot use the standard public password reset. Recovering those accounts requires a separate administrative procedure that verifies the owner's authority.
The Users component's Password Options tab contains password requirements and limits on reset frequency. Investigate the condition blocking recovery before removing a limit to work around an error.
Multi-factor authentication
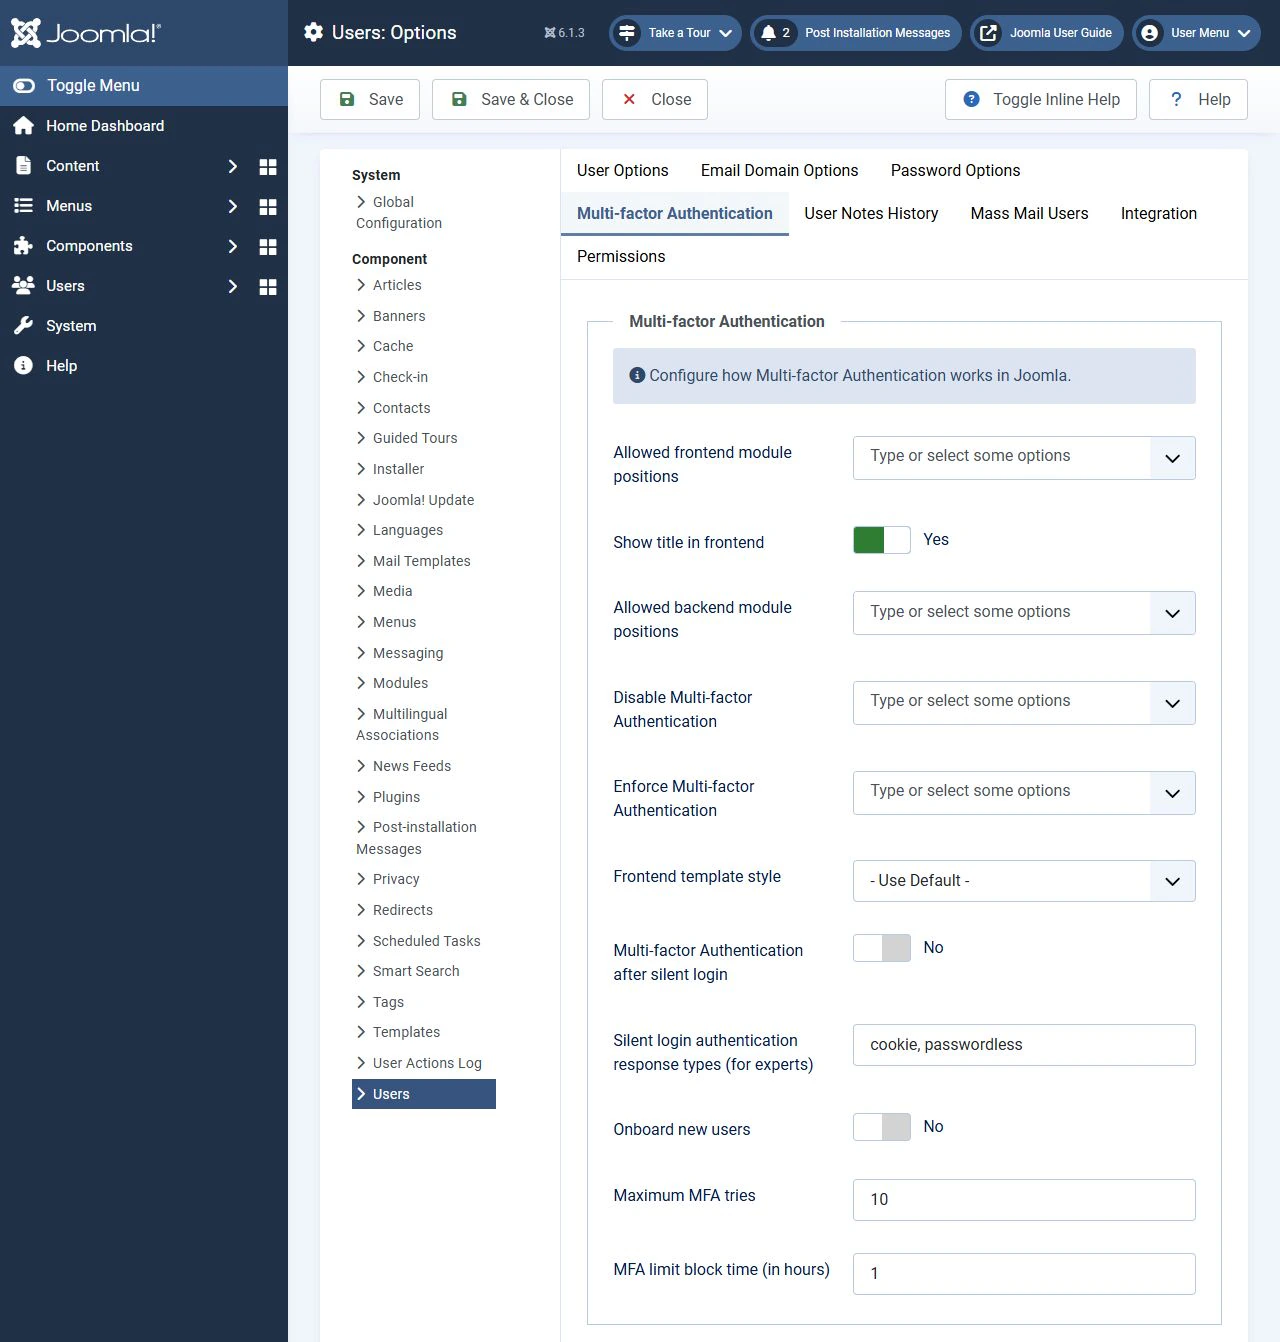
MFA adds another verification step after ordinary sign-in. In Joomla 5 and 6, the user enters a username and password first, then completes verification on a separate page. This differs from older instructions showing a Secret Key field in the main login form.
- The administrator checks available multi-factor authentication plugins under System → Manage → Plugins.
- The user opens their profile and its multi-factor authentication section.
- They add a suitable method, such as an authenticator app code or web authentication, when supported by the browser and site.
- They finish the method's setup and store their backup codes securely.
- They test sign-in in a separate browser session while keeping their existing session available until the check succeeds.
Users can configure several verification methods in advance. Backup codes are single-use and can help when the primary device is lost. Keep setup QR codes, authenticator secrets and backup codes private.
In the user options, administrators can enforce MFA for selected groups. Check the available methods and recovery process before applying this requirement. Review excluded groups and MFA behaviour after automatic sign-in through Remember Me too.
Protect registration and sign-in
Security settings should fit the site's real usage and allow users to recover access. Test changes in a separate environment before applying them to a live site.
- Use HTTPS for registration, login, profiles and account recovery.
- Keep self-registration disabled when it is unnecessary.
- Give new accounts only the permissions they need and choose an appropriate activation mode.
- If CAPTCHA is needed, configure an available compatible plugin and select it in the user options. Install a suitable extension if necessary. Use Default relies on the global CAPTCHA setting and does not by itself guarantee protection.
- Use long, unique passwords and MFA for accounts with administrative permissions.
- Check email delivery, password reset limits and an available backup sign-in method.
- Update Joomla and extensions. Keep existing security controls enabled during demonstrations.
What to check after setup
Test the entire user journey, beyond whether a form appears. Use a separate test account without administrative permissions.
- Guests can see the required forms and cannot open restricted articles through a direct link.
- New accounts join the correct group.
- The selected activation mode allows sign-in only after the required confirmations.
- Sign-in leads to the expected page and provides a way to sign out.
- Username reminders and password resets deliver the expected emails.
- MFA is requested according to the settings and the prepared backup method works.
- Russian and English forms, menu items and emails use the expected language.
If an email does not arrive, check the address, spam folder, site mail configuration and mail service logs. If a signed-in user cannot view an article, check their groups and the article and category access levels. If registration is closed, start with Allow User Registration before changing the template.
Conclusion
Managing Joomla users starts with deciding who needs an account and what they should be able to do. Then choose account activation, the group for new users and login forms. Access permissions, working email delivery, account recovery and MFA complete the setup and help keep it useful for visitors and manageable for administrators.